

Bespoke Garden Annexes for Independent Living



From first plans and your free site survey to planning, installation and final handover, we make creating your garden annexe as straightforward as possible.

Choosing a granny annexe or garden lodge is a big decision, but the process doesn’t have to be complicated. At The Green Room, we manage every stage of your project, from initial plans and your free site survey through to bespoke design, planning, groundworks, utility connections, installation and final handover.
With one experienced team managing the entire project, you’ll always know what happens next. Here’s how our granny annexe process works from start to finish.
From your first enquiry to final handover, we guide you through every stage of your project. See how we bring your granny annexe or garden room to life.

To get started, we’ll send you real one- and two-bedroom annexe plans, complete with images, layouts, specifications and guide prices. These provide inspiration and give you a clear idea of what’s possible before you make any commitment. You can also view our garden annexe prices to see typical costs and what’s included.

When you’re ready to explore your project further, we’ll visit your property for a free, no-obligation site survey. During the survey, we’ll assess the available space, access, ground conditions and utility connections, discuss your requirements and bring material and colour samples for you to see.

Following the survey, we’ll create a complimentary bespoke design tailored to your garden and requirements, together with a clear, fixed-price quotation. You can also choose your kitchen, flooring, cladding and finishes, so you know exactly what’s included from the outset. To view your choices, please visit our Options Page.

Once you’re happy to proceed, we’ll handle the appropriate planning or lawful development process on your behalf, including the necessary drawings, applications and communication with the local authority. To learn more about planning, visit our Garden Annexe Planning Page.

Once the necessary permissions are in place, we’ll schedule your installation. From there, our experienced team manages every stage of the build, from the foundations and SIPs structure through to plumbing, electrics, plastering, flooring, kitchen, bathroom and final fittings. Typically, most granny annexes take around 4–6 weeks to install, depending on their size.

Finally, we’ll walk through your completed annexe with you, check everything is working as it should and provide your relevant certificates and documents. Then we hand over the keys and your new space is ready to enjoy.
Once planning is in place and your installation date is booked, our experienced team builds your granny annexe on site. From there, we take care of every stage of construction, from the foundations and SIPs structure through to plastering, cladding and the final internal fit-out. Here’s how your annexe comes together.

We begin by installing strong screw pile foundations, creating a secure and stable base for your annexe. Building Control approves this foundation system, and its quick, clean installation makes it suitable for a wide range of ground conditions, including sloping or softer ground.

Once the foundations are in place, we move on to the main structure. We use Structural Insulated Panels (SIPs) to build the floor and walls. Precision-cut for an accurate fit, the panels go up quickly and provide excellent insulation from the outset.

With the structure in place, we add internal battens to support the fittings and finishes. At this stage, we also install the electrical wiring and service runs, ready for the sockets, switches and lighting.

Next, we fit the plasterboard and fully plaster the walls and ceilings to create a clean, smooth finish throughout your annexe. Once the plaster has dried, you can decorate the space in your chosen colours.

Next, we add your chosen external cladding, whether you prefer Western Red Cedar or low-maintenance fibre cement board. The cladding gives your annexe its finished look while providing long-lasting protection from the weather. To explore our cladding choices and other finishing options, visit our Products page.

At this stage, we install the kitchen, bathroom and flooring, followed by radiators, LED lighting, switches, wardrobes and appliances. We then fit and finish every detail to match your chosen layout and specification. To explore the full range of options available for your annexe, visit our Products page.
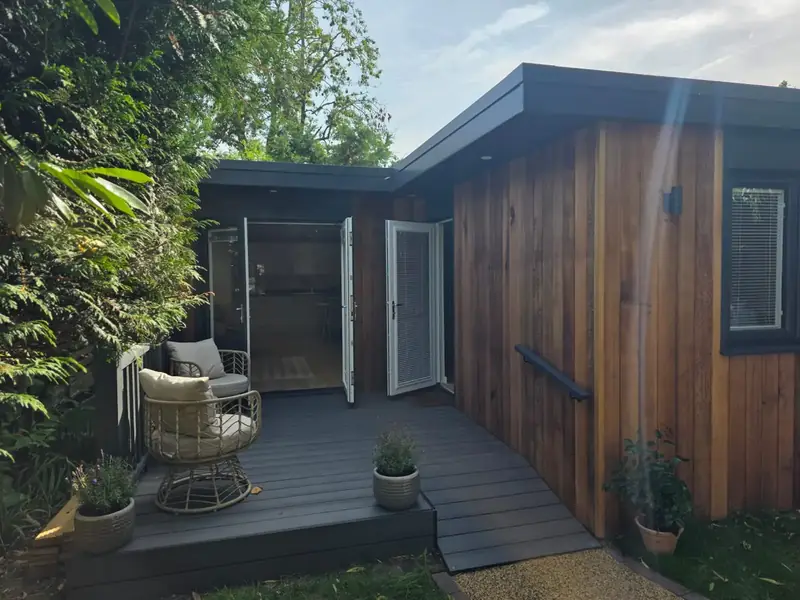
Finally, your granny annexe is complete and ready to use. With all services connected and every detail finished to a high standard, you can simply move in and start enjoying your new space.
We’ll first email you a selection of granny annexe plans with example layouts, specifications and guide prices. If you’d like to explore your project further, we’ll arrange a free, no-obligation site survey to assess the available space, access, ground conditions and utility connections.
Following the survey, we’ll prepare your bespoke design and detailed, fixed-price quotation. If you decide to proceed, we’ll manage the planning, groundworks, installation and internal fit-out through to final handover. You can see each stage in more detail on our granny annexe process page.
Yes. Every project begins with a detailed site visit. We assess access, ground conditions and services, then talk through design options with you face to face.
We manage everything for you, but you’ll be involved in all the key decisions – from layout and finishes to planning approval. We’ll keep you informed every step of the way.
We take care of it all. Whether it’s a full planning application or a Lawful Development Certificate, we deal with the local authority on your behalf. For further information, please see our planning page.
Yes. At The Green Room, we manage every stage of your project, from the initial site survey and design through to groundworks, foundations, utility connections, installation and final handover. We also complete the plumbing, electrics, plastering, kitchen and bathroom installation, so your granny annexe or garden room is ready to use when we leave.
Choosing a turnkey provider means you only deal with one company throughout the project. You’ll have a single point of contact from start to finish, making the process simpler, reducing the need to coordinate multiple contractors and giving you confidence that every stage is managed to the same high standard.
We professionally plaster all internal walls and ceilings to create a smooth, traditional, home-like finish ready for decoration. As fresh plaster needs time to dry fully before painting, internal decoration is not included as part of our installation service.
This also helps keep your overall costs down and gives you the freedom to choose your own colours and finishes. Once the plaster has dried, you can use a local decorator or complete the painting yourself at a time that suits you.
In some cases, yes. We’ll always do our best to accommodate small changes. It’s best to finalise your design early to avoid delays.
Typically, we complete a granny annexe installation within 4–6 weeks, depending on the size and layout. Throughout the build, our experienced in-house team manages everything from the groundworks through to the final internal finishes.
Just fill out our quote request form or give us a call. We’ll guide you through the next steps from there.
The full granny annexe process varies depending on the design and the type of planning approval required. Once we’ve completed your site survey and finalised the design, we’ll manage the necessary planning or lawful development application before scheduling your installation. The on-site installation itself typically takes around 4–6 weeks, depending on the size and layout of your annexe.
Fresh plaster needs to dry completely before it is painted. Depending on the thickness of the plaster, temperature and ventilation, this can take anywhere from around one week to several weeks, particularly during colder or damp weather.
You’ll know the plaster is dry when it has changed from a darker pink or brown colour to a uniform pale finish with no darker patches.
Once dry, apply a suitable mist coat before your chosen topcoat. This helps seal the new plaster and allows the paint to bond properly, reducing the risk of peeling, cracking or an uneven finish.
Tip: Good ventilation and gentle, consistent heating can help the plaster dry naturally. Always follow the paint manufacturer’s instructions for the correct mist-coat dilution, as this can vary between products.
Our team of down-to-earth experts genuinely care about great garden spaces and excellent customer service. Whether you’re just starting to explore your options or ready to move forward with your project, we’re here to help.